The best way to Grow a Honey Locust
March 31, 2018
The honey locust (Gleditsia triacanthos) tree thrives where warm summers give way to somewhat colder winters. Landscapes in Sunset climate zones 7 through 9 and 14 through 16 gain from honey locust’s filtered shade; grass and perennials execute properly under the the 35- to 70-foot treeâs lacy, compound leaves. Its yellow fall colour advances the the treeâs decorative charm. Wildlife relishes the honey- pulp in the -maroon seedpods that follow its moderate, spring blooms that are yellow. The pests of the tree contain scale, spider mites and webworms. The latter provide quicker rooting and simpler harvesting while honey locust grows from softwood or hardwood branch cuttings.
Harvest your branch while the tree is developing, reducing on an early spring or summer morning. Carry a plastic bag containing two damp paper towels along with you.
Look to get a branch with wholesome twigs that split when bent. Produce a cut 4-to 5″ from the expanding suggestion of the branch, beneath a leaf. Store the cutting in the damp paper towels in the plastic bag that is dark to keep it moist before potting.
Mix a low-fertility rooting medium of 50 percent sterile perlite and 50 percent peat moss. Fill your container to 1-inch below its lip. Water the medium therefore it stays throughout potting, evenly moist.
Strip the leaves from your cuttingâs reduce half to keep them from contaminating the rooting medium and also to reduce the cutting’s transpiration, or water reduction.
Sprinkle of rooting hormone powder right into a saucer, a little pile. Create a shallow indentation in the pile using the stick of a florist. Dip the foot of the cutting to the indentation that is shallow and tap it to eliminate the extra. Dispose of the left-over powder.
Insert a floristâs stick to the growing medium into a depth of half the cuttingâs size. Using this hole stops the powder when you pot the cutting from rubbing off.
Position down the cutting in the container using the cut end. Tamp medium of the hole round the fringe of. Water in case your container is less than 3″ deep.
Cover the cutting using a glass jar that is clear to supply important humidity and space to develop. Inserting floristâs sticks in the medium throughout the cutting, sliding a transparent plastic bag up over the sticks and tying it shut also operates.
Move the container to a location with in direct light. Lift or open the covering for two minutes every day-to ventilate the crops and mist the medium.
Watch the cutting for the new progress, indicating root improvement. Before the cutting lifts without resistance, when you are pleased it could be moved, gradually remove the medium. Transfer it into a container far from direct sun of normal planting medium in bright-light. Continue normal watering as it grows and steadily increase the sunlight publicity of the honey locust.
The best way to Create a Cupboard with Particle Board
March 28, 2018
The bulk of manufacturing cupboards are constructed with with particle-board. It is an all purpose materials that stands up nicely. Most properties have particle-board within their construction. It’s affordable, and nearly every inch of particle-board may be set to use. Particle-board may be cut in just about any direction because there are not any grain designs. It may be stained to produce a sleek, flat end. Particle board can help you save money in the event that you would like to include a big pantry or a little upper cupboard in your house. Start by constructing a tiny cupboard that is upper.
Place the two extended bits of particle board on their edges on a flat work surface that is flat. Place the two parts between them, one flush on top, one flush in the underside.
Four 2 inch staples spaced through the extended sides, in to the ends of the brief pieces on each and every side to to create a 24-by-3 2-inch body.
Drop the two pieces to the frame. These can be the shelves. Space them in the frame. Use a tri- to get them straight and after that shoot three staples in to all the the ends of the shelves on either side through the extended sides.
Run a bead of glue over the exterior perimeter of the body. Place the two strips of particle-board flat on the sides of the body. Flush the items on the top as well as the exterior edges and bottom. Pin nails spaced at 4″, to the most effective edge of the body through the strips.
Place the two strips of particle board involving the strips that are extended. Square and flush them with all bottom and the best. Pin nails to secure them to the cupboard. Your cabinet h-AS a faceframe.
Turn over the cabinet so that it is encounter-down. Run a bead of glue over the exterior perimeter edge. Place the 1/4inch hard-board panel on the body and square it on all sides. Hardboard is large-density particle-board. Pin nails throughout the hard-board spaced every 4″ to secure it to the body. Here is the again of the cupboard. Turn the cupboard face up.
The tablesaw blade to 1inch from your tip of the blade that was very best to the idea where the blade enters the dining table. Tilt the blade to 3 levels. Slide the fence over to within 1/32 inch of touching the blade. Run all sides of the 3/4 by-211/2 by-2-9 1/2 inch particle-board panel within the noticed blade to reduce A5/8 inch bevel across the edge on the trunk. You have A – 30-diploma reverse panel do-or.
Sand the door as well as the cupboard using 100-grit sand-paper along with a hand-block. Smooth and spherical every one of the edges. The cupboard out as well as inside with aerosol lacquer to seal it. Spray all edges and the do or. Wait 3-0 minutes for the lacquer to dry.
Place the do-or face-down. The facet ought to be facing up. Measure 2″ from both corners of the do-or on the sam-e facet and create a mark. Place one 30-diploma reverse- hinge on the mark on every end. Screw the hinge to the do-or utilizing 3 and a gun /4inch screws.
Place the do-or face up on the cupboard. To ensure there are equivalent square the do-or to the cupboard unveils on all sides. Place screws and screw the hinges to the face frame utilizing 3/ 4inch screws and gun that is cordless.

The best way to Use Sulphate of Iron to Eliminate Moss
March 25, 2018
The existence of moss in your garden signifies bad conditions for grass. Moss grows where there’s shade or accumulation or where grass can not endure, including poor soil soil which is compacted or drains badly. Sulphate of iron, also called ferrous sulphate or iron sulphate, used in springtime or winter kills moss. Rake it free using a garden rake subsequent to the moss turns brown and eliminate it from your lawn.
Mix 3 ounces sulphate of iron. Five gallons of sulphate of iron handles 1000 square-feet. Take precautions when mixing the sulphate of iron as sulphate of iron stains wood, concrete and other non-natural components, with water.
Pour the sulphate of iron remedy backpack sprayer or watering can for program to the garden. Pump-type sprayers perform best for areas that are big, but places that are little may be watered using a shower spout.
Shower or spray moss with sulphate of iron remedy, wetting it carefully. Avoid sidewalks, patios, garden furniture or alternative non-natural products. When used in the suggested price, sulphate of iron WOn’t damage grass. However, assume grass without accelerating its rate of progress to become green.
Wait three to four times for the moss and turn brown. Use a garden rake to loosen the moss and eliminate it from your lawn.
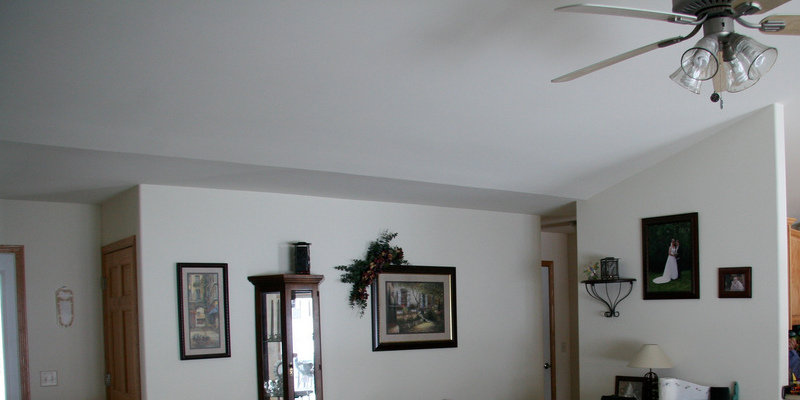
The best way to Replace a Warped Ceiling Fan Blade
March 21, 2018
A warped blade in your ceiling fan can cause the fan to wobble during procedure, tension the fanâs motor and shorten its providers existence, and it doesnât seem really attractive both. Replacing a ceiling fan blade that is warped is one as it enhances the look and feel of the area of the basic jobs real estate brokers might suggest for homeowners hoping to market their house. It is a job which can be completed rapidly, and without cost or the assistance of a specialist.
Purchase an alternative blade that fits with your ceiling fan, possibly by using a blade to the store beside one to make sure or by purchasing in the same producer the blade that is new matches. Home Depot suggests changing all fan blades at once to ensure appropriate stability of your ceiling fan.
Set a ladder up but maybe not immediately below it. Check that the blades can be reached by you and never have to lean back or achieve the ladder on.
Turn the primary energy supply off in the breaker to your own ceiling fan.
Hold the blade that is warped stationary with one-hand, and loosen and remove the screws holding it.
Lift the blade off and up the bracket and set it apart. Therefore small end is facing in toward the enthusiast orient the blade.
Place the blade that is new and align the holes using the screw-holes in the bracket.
Insert a screw to the guts hole and tighten it using the screwdriver. Insert the screws and tighten these.
Turn the strength to the ceiling enthusiast straight back on and abandon it running while its movements is observed by you. The blade shouldn’t wobble. Change the power-off again to tighten the screws should it wobble.

The best way to Clean the Basket in a Electric Percolator
March 19, 2018
Percolators cycle warm water through coffee grounds providing extra options to extract as a lot of the taste and aroma as feasible to the the applying and creating that signature sound. This additional processing ensures the basket can become dirty by oils that stick to the steel and espresso residue. Moreover, the hardness of the water in your home can leave-behind mineral deposits over time. Percolator suppliers suggest a gentle cleansing after every use. Every two months consider a cleansing program, or according to manufacturer specs.
Mild Cleansing
Unplug the electrical percolator in the outlet in the wall. Consume or pour any espresso fluid out. Wait about 10 to 15 minutes for the the machine to cool off.
Fill bucket or a little bowl with 1 quart of water that is hot. Add 2 tablespoons of mild dish detergent to the container. Stir detergent and the water as well as a washcloth. Place the container on cleansing the percolator on the counter-top near where you plan.
Take the lid of the percolator off or cover, in accordance with manufacturer specifications. Discard filter and the coffee-grounds .
Pick out the basket from the percolator, combined with the spreader and stem.
Wipe and clean the basket using the soapy washcloth. Generally, it is possible to wash other areas of the percolator utilizing the same technique, but refer to the handbook for just about any restrictions. Do this over a clear kitchen counter or sink to avoid excessive suds from obtaining on the ground. Rinse the basket under warm tap-water. Dry off the basket using the fabric that is other.
Reassemble the percolator, for example, basket that’s now clear, making it prepared for its use.
Deep Cleansing
Unplug the percolator and empty the contents that are fluid. Discard the filter as well as the used coffee grounds. Leave the lid off as well as the basket from the percolator for 10 to 15 minutes, enabling the the system to cool off.
Fill the percolator with the a-Mount of water in the cold-water faucet that it may hold. Like, in the event the the applying can make 1 2 glasses of of espresso, a-DD only 6 cups of water that is chilly .
Add vinegar to fill up the percolator to the highest. Like, in the event the reservoir includes 6 glasses of of water, a DD 6 glasses of of white vinegar to fillup a12-cup percolator. Refer to your operator guide for the specific quantities of vinegar and water, that needs to be employed for deep-cleaning.
Put the basket in the percolator. Close the lid. Plug it to the outlet. Percolators immediately commence the cycle that is perk. When the cycle is total, an indicator, for example a led-light, may possibly go off.
Wait 1 5 minutes subsequent to the cycle is performed. This provides the chance to de-scale and eliminate stains in the basket, along with other other inner elements of the percolator to the vinegar answer.
Unplug the percolator to change it off it. Pour out the water and vinegar remedy. Allow the the system to cool for 1-5 minutes. Rinse excessive vinegar residue out. Clean the basket and inner portions of the percolator utilizing moderate dish detergent. Don’t blend vinegar and moderate detergent through the cleaning procedure that is deep.
The best way to Replace Kitchen Cabinet Base Molding
March 14, 2018
Where they fulfill the ground, kitchen cupboard foundation molding runs across the bottom of the cupboards. This component, also called the toe-kick is usually shimmed up off the ground to level the cupboard. This leaves a gap between the underside of the floor as well as the cabinet. Base molding spans it over to finish the cabinet installation. It’s attached to the toe-kick with pin nails and mitered in the corners as molding is else where in the house. Cabinet base molding can obtain lots of punishment when the cupboard is approached by individuals, as sneakers speak to the base molding. It’s possible for you to replace it afternoon.
Place the tip of a screw-driver at any mitered or joint edge of the base molding. Use a hammer to push the tip of the screw-driver behind or between two parts of molding. Pry one of the parts free using the screwdriver.
Insert the tip of a crow bar supporting the molding. Pull on it with one hand as you pry using another on it. That is alright in case it breaks. Force carry on prying and pulling off the molding till it is all eliminated and the suggestion of the crow bar beneath the damaged component.
Pull out all of the nails -kick with pliers. Use a putty knife having a flat finish to scrape splinters, chips or glue in the cabinet toe-kick.
In the event the cupboard base molding adopts a corner cut a miter on the foundation. Swing the blade of a miter saw to 45 degrees. Place the flat side of the molding from the miter saw fence. Cut down through the molding so that the blade cuts away the face of the molding. The lengthy point-of the miter should be around the trunk.
Place the foundation molding on the flooring from the toe-kick. Slide the extended point-of the miter to the corner. Hold the molding in location if it encircles another corner, and produce a mark. Mark along the rear of the molding in the corner of the toe-kick. Use a tri-square to carry on the line on the rear of the molding to the best.
Place the molding on the miter noticed fence. Swing the blade to the left or correct to miter the molding. The mark should be to the quick aspect of the molding. Cut the molding on the mark.
Hold the molding set up on the toe-kick and match the miters up with the piece that is formerly positioned.
Hold the molding down tight with one-hand. Pin nails spaced 1-0 inches aside to the toe-kick through the middle of the molding.
Cut still another miter on an alternative piece of molding. Fit the miter to the formerly installed foundation that is mitered. Mark the conclusion and carry on measuring fitting before you happen to be finished, and reducing molding.
Putty mitered edges and the nail holes . Sand the molding with 100-grit sand-paper by-hand. In the event the molding is previously completed, use a putty crayon to fill the holes and edges that are mitered.

The best way to Plant Leonotis Nepetifolia
March 8, 2018
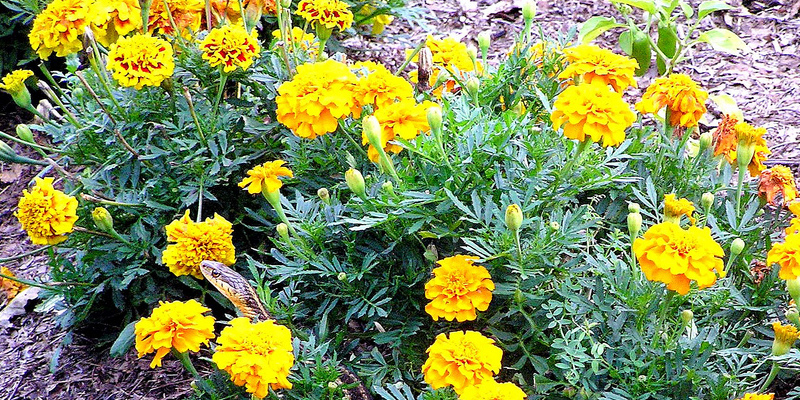
Leonotis nepetifolia is also called annual lionâs ear, klip dagga, lionâs tail and Xmas candlestick. This member of the mint family grows in Sunsetâs Environment Zones 8 through 24 and reaches 4-to 8-feet tall with upright stems and triangular-shaped leaves. The flower heads are coated with 1 inch- trumpet -shaped blossoms. Planting seeds is the most dependable method to increase the ear of yearly lion. Start the seeds indoors eight to 10 months prior to the last spring frost date.
Place peat pellets in a planting tray with 1 inch sides. Add room-temperature water before the pellets swell, and wait. When each of the water is gone, refill the tray. When the peat pellets don’t absorb any more water and are complete, drain the water. Keep pellets to the peat in the while germinating the ear seeds of the lion.
Poke a-1/4 inch- hole in the middle of every peat pellet together with the eraser end of a pencil. Drop a seed into each hole and cover with soil. Move the tray in to an area with bright light. Because this could cause the quick evaporation of moisture in the pellets don’t place the tray in direct sunlight.
Keep the area of the seeds above 50 degrees Fahrenheit. Every time they begin to dry up mist the peat pellets with room-temperature water in a spray bottle. The germination method is stopped by allowing the pellets to dry. Seedlings appear within one to to 2 months. Pinch the ideas of the seedlings off to motivate the plant to to make branches.
Dig a location in full-sun outside using a hand trowel when the lion’s ear seedlings are three or four inches tall. Make the holes a little bigger in relation to the pellets. Therefore the tops are using the soil level, plant the peat pellets. Backfill the holes therefore the crops operate and firm the soil across the seedlings. Water the area properly.
Juniper Crops for Hillside Landscaping
March 5, 2018
Juniper (Juniperus spp.) crops range widely in size and type. From simple âutilityâ floor addresses to shrubs and trees with ornamental berries and needle- or scale-shaped foliage, these tough, drought-tolerant evergreens consider the rigors of hill-side developing with simplicity and appeal. Ground covering drape slopes that are junipers with ever-green texture; trees and shrubs offer anchoring accents. Junipers need no or little watering in many situations, and they are usually ignored by deer.
Ground Protect Junipers
Chinese junipers (J. chinesis) and horizontal junipers (J. horizontalis) prosper in Sunset’s Environment Zones 1 through 24. Chinese juniper âParsonsiiâ grows gradually to TO AT LEAST ONE 1/2 feet tall and 8-feet broad, its flat branches supporting clean, blue green foliage that darkens with age. âSan Joseâ ultimately reaches 2 feet high and 6 feet wide with dark, sage green, needle- and scale-type foliage. Horizontal juniper âBar Harborâ matures quickly to TO AT LEAST ONE foot tall and as much as 10-feet wide with feathery bluish-grey leafage that purples in cold temperatures. âBlue Chipâ and âHughesâ have silvery-blue foliage; equally ultimately reach 1 foot-tall and 6 to 8-feet broad. Hughes is particularly showy.
Juniper Shrubs
Several juniper shrubs offer visible dimension in hill-side plantinga. âSea Greenâ is a compact shrub to 5 feet tall and broad, with deep-green arching branches. âMint Julepâ shows mint-green foliage. âKaizukaâ and âKaizuka Variegated,â identified also as Hollywood junipers, are particularly difficult crops, achieving up to 15 feet high with twisted, up right types. The the size-kind foliage is a deep-green with creamy-white edges accenting the selection that is variegated. âGold Coastline,â at only 4-feet high and broad, makes a a tight, golden-yellow accent.
Juniper Trees
Specimen trees anchor the hill-side landscape visually and physically. The California juniper (J. californica) is a desert indigenous that succeeds in Zones 3, 6 to 12, and 14 through 24, reaching a peak and width of 40-feet, with yellow to rich green foliage. Weeping junipers (J. scopulorum) make striking specimen trees in Zones 1 through 24. Graceful, drooping foliage âweepsâ from trees that ultimately reach 20-feet high and 10-feet broad. âTolleson’s Blueâ and âTolleson’s Greenâ vary only in foliage colour.
Juniper Treatment and Cautions
Full sunlight is preferred by junipers, with a few shade in the latest ranges. They thrive in almost any well-drained soil no matter pH. Junipers in mild, quick-draining soil might need some water, particularly in warm climes. Junipers are susceptible to root-rot in websites that are water-logged. Juniper blight, aphids, twig borers and Spider mites are issues that are possible; crops perform best in well-ventilated circumstances. Volatile oils in juniper crops make them burn up easily in fires; prevent massed plantings near buildings.

The best way to Care for the Pilea Cadierei Plant
March 1, 2018
Pilea cadierei also referred to as water melon pilea or aluminum plant, is an evergreen perennial grown because of its green and silver foliage. The aluminum plant grows hardy to Sunset’s Environment Zone 17 when stored outside in the backyard. In areas that are cooler, it also makes a handsome house plant. The aluminum plant has problems with diseases and pests, plus no pruning is usually needed by it. Provide the aluminum plant fertilizer, mild and the water it wants, plus it’ll reward you.
Grow the aluminum plant in moist, well-drained soil. The aluminum plant prefers soil that’s an acidic, alkaline or neutral pH.
Provide at least four hours of sunlight per day to the aluminum plant. Place the aluminum plant about four to eight feet if grown indoors. If perhaps not enough sun light light comes through your windows use synthetic light.
Place a humidifier alongside the aluminum plant. Aluminum crops require between 70 and 80% humidity to prosper. Should you not have a humidifier, consider relocating your crops into greater-humidity rooms, such as kitchen or the bathroom. It is possible to also improve humidity by placing a water-filled pan on a stove burner that is warm.
If expanding the aluminum plant in-doors keep the temperature.
When the 1/4 inch of the soil feels dry., water the aluminum plant Stop watering when water drips in the holes if growing in a container.
Fertilize the aluminum plant throughout the growing period. Use a well-balanced, water soluble fertilizer, including7-7%7 balanced, water-soluble fertilizer, such as 7-7%77%7 balanced, water-soluble fertilizer, such as 7-7-7 or 202020. Combine 1 tablespoon with 1-gallon of water to make a a solution that is fertilizing. Stop fertilizing throughout cold temperatures.
Check the roots of a container-developed aluminum plant when new growth starts. Transplant the plant right into a bigger container in the event the roots seem compacted.
Salt-Tolerant Perennial Groundcovers
February 27, 2018
Goundcovers that is perennial protect a multitude of terrains that are challenging. They carpet tough-to- redeem areas where grass struggles to endure and mow hills. They’re the liberators of homeowners that are lazy who shun garden mowers. Unlike mixtures which can be bred to protect huge areas and bent grass, groundcovers are professionals that prosper in places where turfgrass both can not be easily preserved or withers. Salt-tolerant ground covers that are perennial specialize in street-side and coastal surroundings.
Salt Air and Saline Soil
Soil includes chlorides and sodium in addition to salts in character; issues only occur when extreme sodium chloride is current. Salt assault may be faced by property on the seacoast from several guidelines; it drop in precipitation might trip the wind in dampness from sea-spray or percolate through soil that is sandy. Salt in the sea can travel far in land should it not meet obstructions like mountain ranges. The sea isn’t the only way to obtain salinity, nevertheless. Wash-down to the soil in spring and road salt — sodium chloride or calcium chloride — can develop to burn off crops throughout cold temperatures. Spray tolerance is expressed in milligrams of salt per liter of water (mg/L) and soil salt is expressed in electrical conductivity (EC) in conditions of deci-Siemens per square meter of soil (dS/m).
Seaside Crops
Salt-tolerant crops that stay from the sea -borne and soil salts. They increase in soils that are sandy, therefore several have root systems that are huge collect dampness and to obtain a foothold. Iceplants (Delosperma âAlbaâ N.E., Drosanthemum hispidum Schwantes., Lampranthus productus N.E. Br. and the others), creeping fig (Ficus pumila L.), creeping juniper (Juniperus horizontalis), sword fern (Nephrolepis exaltata Schott.), Cape honeysuckle (Tecomaria capensis Spach), bougainvillea (Bougainvillea spectabilis) and sea-foam morningglory (Ipomoea stolonifera Gmel.) are all very sea spray tolerant and the majority are are saline soil tolerant as well. Tolerant crops that are coastal endure spray without injury with 600 mg/L of sodium and 900 mg/L of chloride. Tolerant crops stay unaffected in soil using a soil C E of 8 to 10 dS/m.
Native Crops
Plants have developed in a locality, in order that they grow using a minimum of extra nutrients. Many indigenous crops make xeriscape plants that are excellent since they’ve adapted to typical yearly rainfall totals. Coastal grasses including bentgrass (Agrostis), hairgrass (Deschampsia), reed grass (Calamagrostis) and oatgrass (Danathonia) tolerate seaspray and saline s Oil. They pay deep, broad roots that aid stabilize sand. Flowering indigenous ground covers contain ceanothus (Ceanothus gloriosus), California aster (Aster chilensis) and creeping blue blossom (Ceanothus thyrsifl orus var. repens). Wild ginger (Asarum caudatum) is also a California indigenous.
Invasives
Invasive crops add to hearth danger or choke out native crops. Shelter is given by some to wild-life that is unwanted. These plantsâ rapid-growth produce mo-Re issues than they resolve. Salt -tolerant groundcovers make make smarter neighbors across the coastline or on metropolis streets. At the time of mid-2012, the California Invasive Plant Council indicates passing by iceplant, or Hottentot fig (Carpobrotus edulis), English ivy or Algerian ivy (Hedera helix or Hedera canariensis) and periwinkle (Vinca key) and suggests planting hardy iceplant (Delosperma cooperi), rosea iceplant (Drosanthemum floribundum) or free Way daisy (Osteospermum fruticosum) in their location.