
The Kinds of Crops to Use to To Dam the See Over Your Fence
January 11, 2018
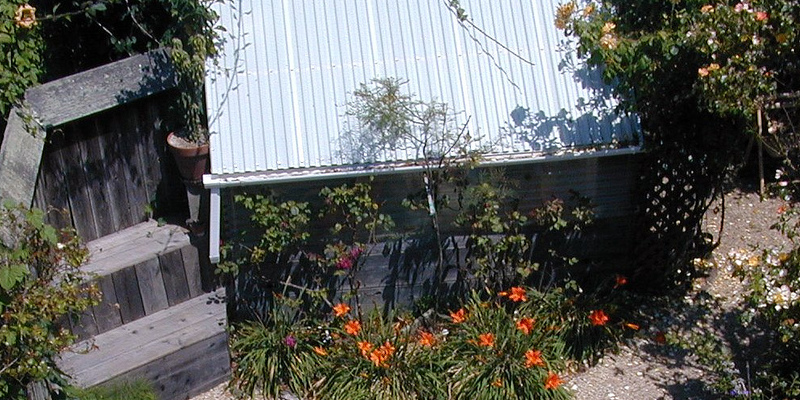
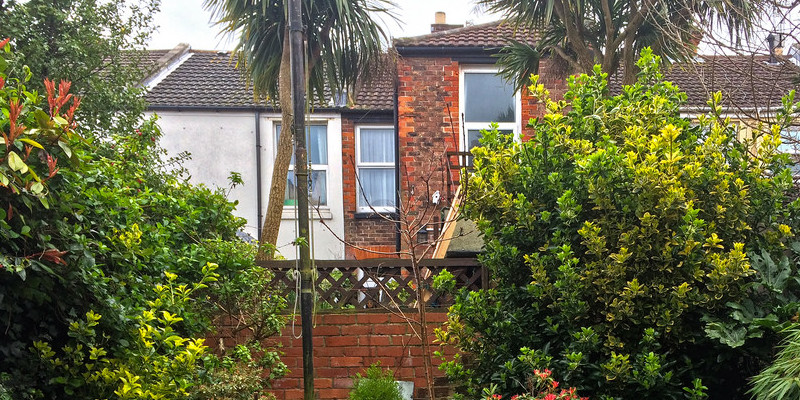
Use crops that grow taller than your fence to give you privacy when your fence is not large enough to block the view of near-by neighbors or organizations. Fast-expanding alternatives provide you with a display that is fast, however they usually need regular pruning to limit them for your fence line. Growers usually provide a display that is thicker when they mature. In the event that you if you want to to to dam sight-lines as well sound in your backyard, install a little fountain; the water masks sound produced outside your lawn, giving your oasis a sense that is private.
Trees
Evergreen trees are the most useful option for privacy screens as they protect your lawn from prying eyes in cool climate and they do not shed their leaves in the cold temperatures. Fast-expanding options contain cypress, like the Leyland cypress (Cupressocyparis leylandii) or arborvitae, like Thuja occidentalis “Emerald-Green”. Both can increase 3 to 4 feet per year and will grow up to 20-feet high.
Shrubs
Even though it often takes requires several years to achieve that phase in a peak that tops your fence evergreen shrubs generally provide a hedge when mature. The American boxwood (Buxus sempervirens) can attain heights of 10 feet. Sweet bay laurel (Laurus nobilis) may be developed as a tree, but it gives its greatest privacy screening when pruned as a tall shrub. Its own fragrant leaves may be dried and used, and bay has tiny flowers in the spring to brighten your backyard as a seasoning in stews and soups.
Trailing Vines
Attach a lattice that is simple to the very best of your fence and train trailing vines through it sense. It wants to be cut straight back frequently to include it, although English ivy grows rapidly and stays green all yr. To get an aromatic and colourful contact, take to clematis (Clematis armandii), which comes in many different sizes and shades, or sweet-pea (Lathyrus odoratus), a yearly which flowers all summer and some-times to the winter. Each vine grows about 6 toes long, producing it simpler to include than some vines.
Bamboo
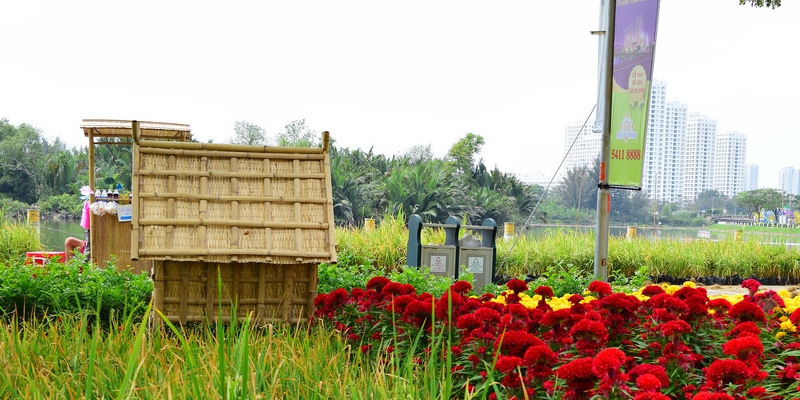
Bamboo maybe not only grows and spreads swiftly, but nonetheless, it also gives a unique sense to your own lawn. Running bamboo can develop to 5 feet in a yr, also it spreads out a-T in regards to the sam-e fee. The down-side is you should mow the shoots down swiftly to support the the bamboo it can rapidly takeover your lawn without consideration that is steady. Clumping bamboo spreads up to two-feet per yr, creating it notably mo Re manageable. Prune bamboo in the required height by slicing it above a node that is joint. Arrow Bamboo (Pseudosasa japonica) is a clumping bamboo that’s big leaves, which which can make it especially ideal for producing a dense display. Golden bamboo (Phyllostachys aurea) is an operating bamboo with leaves positioned equally large and low on the stalks, which provides to your own privacy in case your fence h AS open slats.

The best way to Keep Tile Throughout Cutting
January 5, 2018
Tile is a a deluxe, visually interesting and durable substance that makes an investment seem just like a designer master piece. Ceramic tile installation is not a a job that is hard, but you might you may want to to reduce tile parts to to suit certain locations. Due to the compressed character of tile, it may crack, split and fragment when you attempt to reduce it. The the easiest method to tile from cracking is to use a ratingandsnap a diamond saw or tile cutter.
ScoreandSnap Tile Cutter
Cut straight cuts that are typical using a scoreandsnap tile cutter. The cutter is available at most hardware shops. The location where you want the tile piece to to match. Draw a line using a carbide-tipped pencil as well as a ruler to mark a straight-line in the tile. The pencil lightly, or scores the tile, cracks. Score the tile with one easy stroke, rather than cuts that are little. Lowes.com states that recurring scoring can trigger a tile to chip or split.
Slide the tile below the scoreandsnap tile cutter. Align the tile therefore the blade recognized as a reducing wheel, is centered over the line that was scored. A line on the cutter, typically silver-coloured, assists guide your cut. Adjust the brackets to support the the tile in place while you cut.
Pull the steel handle ahead and press down with pressure that is mild. The handle down most of the way and pull-back the tile using a cut. Slide the steel that is same press down and handle to the midst of the tile. Pressure snaps the tile in the line. Lowes.com suggests implementing equivalent stress on both sides of the tile with your hands fingers. Too much stress can cause tiles to crack and break.
Diamond Damp Observed
Opt to get a diamond moist noticed to generate cuts, or notched-out are as, in a bit of tile. Because buying one is costly of a lot of bucks, rent a diamond moist noticed. Fill the reservoir tank of the diamond moist saw’s with cold-water, using a tiny cup or pitcher. Draw a line using a carbide-tipped a normal pencil to mark where the tile wants to be cut or pencil.
Turn the motor on by the on/ swap off. Guide along the straight-cutting line toward the blade. Keep one-hand on both sides of the tile, retaining your fingers a long way away from your blade, to feed the tile to the blade. Cut the tile.
Pull the tile away from your blade. Rotate the 2nd marked line lines up using the blade. Feed the tile toward the blade and slice the the tile. Continue the procedure until all notches are cut. Turn off the motor and re fill the reservoir as-needed.
The best way to Grow Grace Ward Lithodora
December 30, 2017
Grace Ward Lithodora (Lithodora diffusa âGrace Wardâ) grows as an ever-green in U.S. Department of Agriculture plant-hardiness zones 6 to 8. This ground cover creates prostrate branches that form a mass 36 to 48-inches broad and 6 to 12″ tall. Trumpet- shaped flowers last from springtime before the conclusion of summer. Lithodora is a low-maintenance plant for rock gardens, butterfly gardens and landscapes. In places it grows in full sunlight, although in warm climates Grace Ward Lithodora does best in shade places.
Loosen the soil to the depth of 10″ in a circle 3 times using a shovel as broad as the plant pot. Lithodora needs excellent draining soil of planting medium, with all the texture. Mix a 2- to 4 inch layer of organic matter like peat moss, compost or manure to the soil. Smooth the soil using a rake.
Dig a hole that’s the same depth as the container. Remove the plant in the container, retaining the soil round the roots. Place the rootball in the hole and fill across the roots using the soil that is amended. Plant all of those other Lithodora crops or closer if quicker area protection is wanted.
Water the Grace Ward Lithodora seriously using a drip hose to motivate to grow. The best time to water is in the morning so the leaves have time. Water the Lithodora in the first-year when rainfall is minimum.
Spread a 1-inch layer of bark or leaf mulch round the plants. Don’t pile the mulch stems. Mulch is essential for decreasing water evaporation in the soil, safeguarding the roots from extreme temperatures and stunting weed development.
Following the flowers quit blooming trim the crops back using a pair of pruning shears in the summer. Cut wayward and a way stems branches. Trimming the crops controls dimensions and the form of the Lithodora.
Feed the Lithodora crops only if it is needed by them in the late-winter or early spring. This plant will sign its need to feed by creating greenish yellow leaves. Use rhododendron fertilizer in the suggested rate on the bundle.
Arbor Ideas to get an Attractive Privacy Fence
December 25, 2017
A privacy fence that is attractive accomplishes objectives: while decorating your backyard, providing privacy. Adding an arbor to this type of fence could be a weekend project or portion of a bigger fence task. An arbor is a framework that shades a bench. You can choose not to contain a bench in the arbor, depending on choice and your garden dimensions. Make sure this over-head construction is not above the maximum height restriction for fencing in your municipality before including an arbor to your own privacy fence.
Vine Supporting
Develop an arbor that supports vine development, in case your privacy fence consists of lattice materials, in to which you plan to develop a vine. This sort of arbor from various materials — instruction lines, plastic, wood or iron. You never require to invest inexpensive components for the arbor development, causeing the arbor one of the least costly alternatives since the objective of the arbor will be to support a vine that handles it. “Sunset” magazine suggests a few fast-growing vines suitable to different backyard problems: Western virginâs bower (Clematis ligusticifolia) grows nicely in the shade, and California wild grape (Vitis californica), or Rogerâs Red, is a fast growing sunshine lover.
Gateway Arbor
A rounded or arched type above a gate way in a privacy fence is a traditional use of an arbor. You are able to also use gorgeous touches to high-light the break-in the privateness fence, producing it effortless to seek out the door while it is possible to grow vines over this sort of arbor. Keeping the arbor bare of plant development makes it a compelling stage in case your privateness fence is coated in vines. Use components that may withstand neighborhood circumstances, including salt and fog, as nicely as temperatures in case your backyard is farther in land. Add a pathway and use a vibrant paint for the gate utilizing components that withstand changing dampness circumstances and temperatures.
Additional Privateness
An arbor atop a privacy fence supports shielding your backyard where your neighbor’s residence might appear in to yours. While it is possible to use a vine, you are able to use the arbor for shading that attracts across an outdoor or area of of your backyard as an anchor. Build the arbor of wood, laying brief bits of wood across the frame that is fundamental, and use eye bolts to tether. Attach sunlight- and dampness-resistant material to the supports, utilizing grommets in the cloth to to to slip the material again and forth as privacy and climate need.
Using a Bench
A privateness fence needn’t be intrusive in to your garden landscape. Sometimes, you require only a fence that is partial to protect or obscure the see into portion of your backyard. Use this possibility to generate a bench below expanding vines on each side, the arbor and in your backyard, supplying a restful location within the arbor framework. This kind of arbor is especially of use in transforming an awkward place in your backyard in to an oasis, including a neglected sideyard that abuts the window of a neighbor. Use a latticework privateness fence to to guide a fastgrowing vine proper to your own microclimate, or spot huge containers in the root of the fence and plant a vine that grows nicely in a container and enjoys shade on its roots and sunlight on its ideas, for example Chilean bellflower, or copihue (Lapageria rosea).

The best way to Wire a Classic Lamp
December 22, 2017
A fashionable classic lamp may be securely re-wired with just several supplies found in the hardware shop. Once, re-wired, your classic lamp will glow brightly in virtually any room of your selection. A -type classic lamp will add romance to your bedroom, as well as a 1960s-era classic lamp can provide sophistication to a living . that is space Tag sales and flea markets are a great spot to get lamps, which which can be very affordable when they require re-wiring.
Unplug the lamp and eliminate the harp, shade and bulb. The screw set that retains the lamp. The screw set comprises a shell, the human anatomy, a sleeve using a cap as well as a switch.
Cut off the electrical cord that is outdated 2″ in the lamp bottom together with the wire nippers. Attach the conclusion of the lamp cord that is new to the stub of the cord with electrical tape. Before the cord can be viewed pull the cord up through the lamp body. Unstick the tape and toss away the cord.
Thread the cord that is new and screw the cap to the very best of the lamp body.
Pull 6″ of the two parts of of lamp cord together with your fingers aside. Tie the two sections together in an underwriterâs knot. Make an underwriterâs knot by forming loops of every section and inserting the part ends through the reverse loops.
Strip 1/2 inch of each area end with Wrap the copper wires across the brass socket screw clock-wise, wrap the wires across the screw counter-clockwise.
Pull the cord up firmly in the underside of the lamp base. Replace the screw established, screw-in the bulb that is light and change lampshade and the harp.

Vegetable Planting Calender
December 19, 2017
You know that there’s always some plant prepared to get into to the floor in the event that you are lucky enough to reside in an area having a long growing period. But gardeners residing in areas with nearly or constant -constant planting instances should keep in mind the planting calendar. Greens that prosper in Oct may wilt in July, while heat-loving vegetables will wither when the floor is still cool, if put down.
Large Perennials
In warm climates, crops that come bare rooted — nevertheless dormant and perhaps not in a pot — can go in the floor in January, according the College of Californiaâs Alameda County Master Gardeners system. Vegetable crops in this group contain artichokes, rhubarb and asparagus. Bare-root plants can dry rapidly when you unwrap them from mail-order packaging or the nursery. Keep them moist by putting the plants in pots filled with soil or in a trench that is moist before planting.
Cool-Season Annuals
As the title indicates, cool-season crops prosper before and following the greatest months of the year. Greens are traditional cool-season veggies, as are the Brassica family members like cabbage and broccoli. By beginning these seeds indoors, get a jump on the the growing season. Established them in the backyard when seedlings are strong enough for transplanting. Generally, the planting time for cool-season annuals is in March, whether youâve began them your self or purchased them in the nursery. Hardy root-crops like potatoes, radishes, carrots and turnips are established to the backyard in March, both as sets or immediate seeds, or as seedlings. In September or August, the cool-season veggies may be started for fall harvest, by direct- starting them indoors or seeding them.
Warm-Time Annuals
Start summer crops indoors in March or February, depending on progress needs. Vegetables before environment in the floor, requiring over four months contain peppers, eggplants and tomatoes. Before you go to the backyard vegetables which can be began in-doors about a month cucumbers and include squash. The typical month for establishing these warm-time yearly seedlings in the backyard is Might. Cold temperatures squash, green beans, shell beans, plant corn and summer squash immediately in the backyard surrounding this this period as nicely — as early as April for are as and in-May or June for the locations chilled by fog or large elevations.
Year-Round Plantings
In the locations, some plants are continually planted, even though the cooler time crops might be most tasty in cold temperatures months. Mustard greens, scallions, lettuce, kale, beets and chard therefore are especially useful in the event that you reside in a region having a long developing period but with a few cool weather and belong to this group. Otherwise, plant the yearround greens under shade cloth or among tall plants during the peak of summer.
Compatible Tomato Plants
December 12, 2017
Just like all things that are living, some crops are suitable for the others and a few plants aren’t suitable. Crops that are compatible usually offer some advantage to the crops of along side they can be grown. By way of example, one plant might entice bugs that gain the other. The root systems of some crops also function nicely together. Sometimes, compatibility is based on folk-lore and expertise. There isn’t any scientific study that supports several companion plantings, in line with the Cornell Cooperative Extension. But you will have variety in your backyard, so decide to try these combos although at and see what results you get.
Compatible Flowers
Marigolds and Calendula might offer some safety to tomatoes in the backyard. Calendula, also called pot marigold, usually repels bugs, including hornworms, that hurt tomatoes. French marigolds offer defense against insects and hornworms including whiteflies. Tomato crops aid rosebushes at the same time. A tomato near roses safeguards the rosebush from spot. Tomato leaves include a chemical that acts as an insecticide, in accordance with Louise Riotte in “Mother Earth News.”
Compatible Herbs
Plenty of herbs are suitable for tomato crops. The traditional blend of basil and tomato operates on the plate as well as in the backyard. Basil is considered to keep mosquitoes and flies away in the tomato plant, in line with the Cass County Extension of North Dakota State University. Basil might also enhance the flavor of the fresh fruit of a tomato plant and assist the plant grow, although it’s not scientifically verified. The only way to check would be to try planting tomatoes that are near in the backyard. Other herbs that increase nicely beside tomato crops contain parsley, chives and bee balm.
Compatible Veggies
Vegetables are suitable for tomatoes in the backyard. Carrots and onions, as are cucumbers and members for example garlic and asparagus are equally compatible with tomatoes. Tomato crops deter the asparagus beetle, despite the fact that the crops are generally expanding in the backyard a-T various occasions of the yr. While tomato grows in the time asparagus emerges in springtime. Red spider mites are repelled by garlic bulbs, in accordance with Riotte.
Incompatible Crops
When they have been planted nearby, some plants harm tomatoes. Tomatoes and potatoes are members of the sam-e family. They’re vulnerable to infections and the sam-e ailments and needs to be stored significantly aside in the backyard. Corn is an alternative plant which is not appropriate for tomatoes, as equally crops are attacked by a worm. Cabbage crops t-Ends to stunt the development of tomatoes too. Members including kale and broccoli, require lots of nutrition in the soil. They eat up all the nutrients, leaving none.
Ficus Blight
December 9, 2017
Ficus trees, which which regularly function elaborately trunks, can serve as points of interest for the outside living areas of your home. Trees are vulnerable to fungus infections, blights that are called. These generally appear as fungus strands on the leaves or branches or as spots on leaves. These infections usually eliminate the ficus tree rapidly, but the plant may be saved by quick motion with fungicides. If not, it could stop the fungus.
Botrytis Blight
In areas with moderate temperatures all the year, the most frequent blight issue for ficus trees is botrytis. This can be a fungus that attacks the plant in early summer and the spring when the weather is great, particularly in moist climate. The fungus grows on plant materials like leaves, in your backyard. The wind produce in the spring and carries the spores to nearby crops. Your ficus is vulnerable in the event that you lately pruned it, leaving wounds that are open . Spot the b Light by searching for spots on the leaves that depart and rot holes, which ultimately destroy the infected leaves. You might also see grey webbing or along branches of your ficus. Your ficus might continue to develop new leaves to get a while but the leaves usually seem harmful and disfigured.
Southern Blight
Southern blight is most frequent in apple orchards of the South-Eastern United States, but it seems in moist climate, particularly in the hotter summer months around the region. Blight can damages rapidly trees; from the time signs are noticed by you, it might be too late to conserve the plant. Trees are typically contaminated via the root-system, which enables the fungus to develop to the exterior from your inside of the plant. The first symptom might be an unexpected wilting of your ficus that rapidly evolves into leaving that is yellow. You can verify it really is southern b Light which is killing it when you see cotton-like fungus developing on your own plant. There might be tiny pods that seem like seeds in the fungus masses that are white or on the bottom beneath the ficus that is contaminated. These seeds keep in the s Oil before the subsequent summer, when they are able to spread to crops that are near-by.
Prevention
The most readily useful way to take care of ficus blights would be to prevent them. Instantly eliminate the plant, when you yourself have any plants in your backyard afflicted having a fungus. Before relocating it during your backyard to stop spores that may infect other crops bag it. Dig the soil up across the plant, eliminating every one of the s Oil that was near any base of the of the plant. Replace the s Oil with potting combine. Water your plants in the morning, which enables the s Oil as well as your crops to dry some before evening falls, lowering extortionate moisture that permits fungus to develop. Remove lifeless plant matter as quickly as possible, in the event that you are encountering a wetter than typical spring or summer and eliminate mulch around your crops. Where the fungus could possibly be hiding the mulch retains dampness in the most truly effective layers of s Oil.
Treatment
In case you feel your ficus could possibly be afflicted with b Light spray it and the near-by s Oil using a fungicide and carry on every 1 times, implementing, or mo-Re frequently if directed by the maker. Fight botrytis b Light with fungicides that are such as chlorothalonil or sulfur. Try azoxystrobin or terraclor to aid with southern b Light; it might prevent the fungus from spreading to other crops in your backyard, although this may possibly perhaps not save your self your afflicted ficus. Because the plant is usually started within by b Light, the fungus that is noticeable may be killed by spraying having a fungicide on the surface, but nonetheless, it seldom kills the fungus dwelling inside.

The best way to Lay Flagstone in the Grime Using a Weed Barrier
December 4, 2017
A walkway does more than improve the curb appeal of a house. Laid together with a weed barrier and when correctly organized, it offers a good exterior area for supporting furniture with no annoyance of rising weeds or strolling. The normal look of flagstone could be improved by planting floor handles that were preferred to develop between the stones, while offering a gentle contrast to the tough stone.
Check local building codes to make sure the undertaking that is prepared is in compliance with all laws. Contact local utility companies to make sure that digging WOn’t interfere with any existing utility lines.
Outline the location for the task that is flagstone. Lay a water hose in the required shape of the task. Use marking paint to to find reference points in driveway or the website, including distance from your house. Mark one aspect of the flagstone use that as a manual to mark the 2nd aspect and task location.
Measure width and the length of the region that is outlined. Add 3 to 4 inches to the width measurement to enable foundation assistance of the flagstone. Multiply the length by the width to find out the square footage of the region.
Excavate the area that is marked into a depth of of around 4″. This may allow to get a 2 inch foundation of 2-inch and gravel flagstones. Adjust the depth of excavation if a gravel foundation is preferred or in the event the flagstones are thinner.
Lay a weed barrier, including landscaping material, straight together with the area that was excavated. Allow parts of of the landscaping cloth to overlap by roughly 4″. This stops grass and weeds from developing between the flagstones and this allows a supportive foundation for the gravel.
Fill the region using a 3 inch layer of onequarter-inch gravel. Compact the gravel with compactor or a tamper. Spray the gravel using a fine mist of water to to be in it more.
Lay the flagstones together with the gravel to produce the required pattern. Try to sustain an area of no over 1 1-inch involving the flagstones. If necessary, use rock and a chisel hammer to trim the flagstones to to match. Tap the flagstones using a rubber hammer to seat them.
The space involving the flagstones with one-quarter or sand -inch gravel. Spray the complete flagstone layout using a great mist of water to to be in the sand or gravel. As-needed to achieve the peak of the flagstone add extra sand or gravel.
The best way to Grow Canary Melons
December 2, 2017
Canary melons are also called Jaune des Canaries melons and San Juan canary melons. The rind is bright-yellow, as well as the melon is oblong-formed. The flesh is juicy and pale, having a mild taste similar to some honeydew melon. Canary melons need a growing period of approximately 80 to 3 months. They require lots of warmth to achieve maturity, therefore they can be hard to develop in the locations that are cooler, while melons prosper in the valleys of California. Consult microclimate details to ensure the growing period in your location is warm enough to permit the melons to achieve maturity and enough.
Check the acidity of your soil. Canary melons choose a slightly acidic soil, having a pH of 6.0 to 6.8. Amend required to carry it it to the pH array that was proper. Work organic matter and 5-5-5 fertilizer into the soil to provide the good drainage and %5d 5-5-5 fertilizer into the soil to provide the good drainage and nutrien5-5%5organic matter and 5-5%55%5organic matter and 5-5-5 fertilizer into the soil to supply the excellent drainage and nutritional elements needed by melons.
Sow the seeds into the backyard when all risk of of frost is past as well as the ground has warmed and dried. Build little hills in rows six-feet apart. Plant three to five seeds per hill and only one inch. Water carefully. When two sets of true leaves appear, leaving two plants per hill, thin seedlings. Plant two per hill, if you’re transplanting seedlings, and water carefully.
Water weekly, offering one to to 2 inches of water per week. Water in the morning to allow leaves to dry throughout the day. Water in the price of two inches per week when the fresh fruit was set by the blossoms. When the melon is beginning to mature, about three months before harvest cut back to one-inch per week.
Fertilize every 2 to 3 months with an all purpose fertilizer. Follow the directions on the fertilizer bundle.
Harvest when the melon slips easily from your stem and smells sweet.