
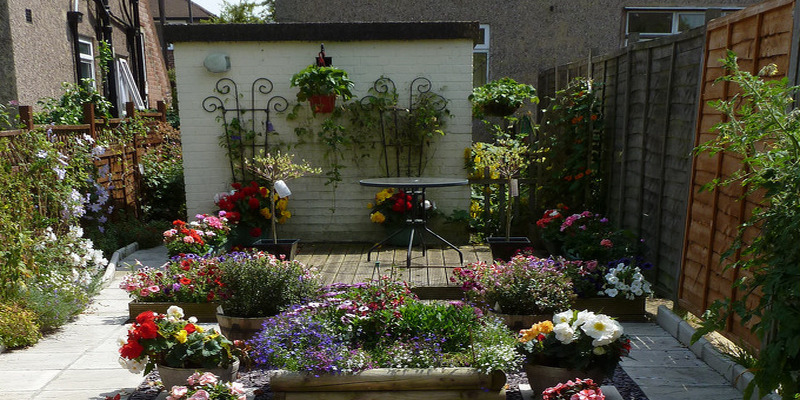
The best way to Feed a Sundew Flytrap Plant
November 30, 2017
Plants usually reside in damp, boggy areas that have soil that is bad. So that you can get the nutrients they require, they’ve developed the capacity to catch and devour bugs. Several different groups of carnivorous plants exist, for instance, active trap, including the well-recognized Venus flytrap, that senses its prey and quickly snaps shut on it; the pitcher-type trap, long, cylindrical tubes that bugs could possibly get in to but not out of; and sticky crops, including the sundew, that maintain bugs using a sticky, mucous-like material. While many folks believe these crops should be fed every day carnivorous plants can really go with no insects for extended durations. It is possible to do if you’re careful not to give it too much, for those who have a sundew which you want to feed.
Make sure your sundew plant is in excellent condition and prepared before you attempt to give it any bugs to consume. Should you feed bugs into a plant which is in bad condition, it is possible to cause mildew to be developed by it, as well as the leaves keeping the insects will die. It will take lots of power to eat up a plant which is lacking that vitality will contain the the prey until it rots, along with bugs, which outcomes in the dying of this section of the plant also.
When it h-AS beads of gel on the spikes feed your sundew only. Sundews have intervals of time where they’re not producing the substance that is sticky, which is pointless to feed them over these today. Some individuals suggest that you mist the crops with water should you not see beads that are sticky on the plant, but according to the Worldwide Carnivorous Plant Culture this is pointless.
Grab an insect using the tweezers, and spot it. Be mindful perhaps not to use a bug that is very large, because it may damage your plant. Also, although sundews favor foods that is stay, it is possible to feed them dried blood worms obtained in the pet-shop or flies. Before feeding them, it might help to soak the blood worms. You’ll be able to feed other or ants little, live bugs to your own plant. If you feed it a solitary bug about once a week, your sundew will do most readily useful. You’ll be able to place it in a open location where bugs will be probably to land about it, in the event that you would like to permit it catch its own meals.
The best way to Raise Romaine Lettuce
November 25, 2017
Romaine lettuce in a house garden delights salad lovers with the easy supply of greens. Lettuce is a cool-climate crop, but in great, moist places, it is possible to space plantings through the year for continuous harvest, preventing the the heat of mid-summer that stunts their development and makes lettuce crops wilt of romaine. Keep the developing crops great with normal watering to appreciate fresh romaine lettuce out of your garden if temperatures go above above 80 degrees Fahrenheit.
Lettuce begins from an area nursery or start seeds in a greenhouse or indoors in mobile packs clear plastic seed trays or pots three months before transplanting them to the outside garden area. Disease- free – aerated blend provides your lettuce seedlings the most healthy problems for germination. Top-soil that is regular is usually fat and could be contaminated, therefore West Seattle Nursery and Garden Center suggests a seed- starting mix containing perlite and vermiculite.
Fill the 3/4 total of the potting, location two lettuce seeds on protect with 1/4 inch of potting mix. Water planting and keep trays or the pots in a area. Water every 2-3 times before the sprouts seem, maintaining the soil great and moist. Romaine lettuce germinates at 7 to 10 times.
Select an outside lettuce planting location which gets 3 to 4 hours of sunlight per day and shade. Romaine lettuce grows best between 80 and 45 degrees Fahrenheit. Purchase a soil test kit when you are waiting to germinate and take soil samples in the top 6″ of soil in this region of your garden. Discard any plant particles and allow the soil dry. Place one sample in every test vial. Add the chemicals from water and the test package. Compare leads to the colour chart to decide pH ranges that are current.
Treat s Oil with sulfur to reduce pH or lime stone to elevate it, asneeded. Romaine lettuce grows most readily useful with a pH of 6.2 to 6.8. Work nitro Gen-wealthy fertilizer and s Oil amendments like blood meal, cottonseed meal or manure that is composted in to wealthy, nicely- drained s Oil one week prior to starting to transplant the seedlings. Use 3 to 4 lbs per 100-square toes of backyard.
Romaine lettuce that is transplant seedlings as quickly as the floor isn’t frozen, up into a week ahead of the frost that is anticipated. Seedlings are hardy and may withstand floor temperatures only 4 5 levels but by transplanting on an awesome, over cast day relieve the transition. Dig 4inch by 4 inch holes and area seedlings one foot apart with the rows being 1 2 to 16-inches apart. Overcrowding will stunt the development of the lettuce. Cover root foundation or the seeds of the seedlings with 1/2 inch of soil. Keep the plants moist and cool with quick although repeated waterings to prevent waterlogging.
Lettuce feeds from your soil, continue through the entire growing time to offer nitrogen for lettuce to increase precisely and so fertilize after planting. Weed often to deter pests and give the most gain in the sunlight and s Oil nutritional elements to the crops.
Plan to harvest the crop in late spring to early summer soar, 65 to 70 times after planting. Harvest in the first morning after the dew dries for the lettuce that is sweetest. Pick the greater romaine leaves which have shaped the middle rib that is white in the outside through the entire growing period while permitting the interior leaves to carry on developing. At 7 to 85 times, when a a decent leaf cluster is formed by the lettuce, slice the off the plant at groundlevel before it goes to seed. As the warmth will rapidly trigger lettuce to to show bitter and bolt a lot more than a day or two of warmth above 85 levels also reveal harvest-time.

The best way to Prune Phlox Subulata
November 21, 2017
Also called creeping phlox, Phlox subulata is a perennial that shades the landscape using a blanket of vibrant, five-petaled blooms in springtime. Phlox subulata is simple to develop but it will be revitalized by pruning, encourage new growth and keep the plant. A strong, cold-tolerant plant subulata thrives in dry soil and bright sunlight. It’s appropriate for developing in U.S. Department of Agriculture hardiness zone 3 and above.
Cut phlox subulata again by one third to one half of its own height following the first flush of blooms fade in late spring. Use a weed trimmer or hedge shears. Use a mower with all the blade on the setting in the event the region is big.
Prune the plants a second-time, reducing back to about 3″, following the crops start to die down in drop and fade. The following year, do not prune any nearer to to the floor, as doing so might damage the crowns of the plants and avoid wholesome development.
Remove the trimmings using a rake avoid illness and discourage bugs.

The best way to Disconnect a Sink
November 5, 2017
A sink is a relatively permanent installation, but some times alternative renovation or a remodeling project needs eliminating one. Rebuilding kitchen or your bathroom, for example, might need disconnecting a sink to get a period while development is happening. Moving drain lines and water-supply typically needs a plumber as well as a work permit, therefore check prior to starting a task with local building authorities. A homeowner can disconnect bathroom or a kitchen sink himself, nevertheless. Kitchen kitchen sink with garbage disposers are more more difficult to unhook.
Turn the water off in the shutoff valves underneath the sink and set pan or a bucket underneath the drain to catch water that may spill. Turn on the faucet, both warm and cold faucets, to drain water in the supply lines.
Remove the cold and warm water supply lines from the shutoff valves. When they can be soldered in place, cut copper pipes using a tubing cutter. Unhook compression connectors, on each copper or tubing that is flexible, with two wrenches — one to support the the shutoff valve, the nut on the hose. Drop the ends of the lines to the bucket or pan to catch any water that is remaining.
When there is one, take off the garbage disposer in a drain. Unplug the the system or turn off the electric power in a circuit-breaker and disconnect a drain line in the bottom, generally by loosening a collar that fastens it to your main sink drain pipe. Set a bucket lined beneath the disposer when it’s released to catch it. Free it by tapping the ring using a hammer in the top to change it it counter-clockwise.
Loosen the compression nuts on P-traps, u shaped pipes fixed into a sink drainpipe on one end and also into a main drain pipe coming from a wall on the other; your bathroom sink will have a solitary P-trap unless it h-AS a double drain, a split destroy will have two P-traps. Turn the nut in the principal drain line with slip-joint pliers before it is possible to turn it byhand. Once the primary drain line is loose unfasten the nut. Pull the P- trap.
Disconnect the sink it self by by eliminating nuts or the clips that fasten the sink into a vanity, counter-top or cupboard; these fasteners will vary together with the kind of sink as well as the sort of counter or cupboard best. Cut out any caulk or sealant across the sink edges having a utility knife to free it.

The best way to Install Carpet Seam Binder
October 30, 2017
A carpet seam binder is a description that is deceptive. The binder is really when the carpet transitions to a different floor, a transition piece utilized to protect the fringe of of a carpet. The most frequent kind of binder is metallic. These steel strips are simple to to install and easy to cut. Transitions are available that are larger. All these are utilized when the carpet is positioned adjacent to a tile flooring that was thick or hard-wood.
Measure the width of your doorway opening. Since they are able to cover a doorway seam between two parts of carpet seam binders are also also referred to as saddles.
Place your seam binder in a noticed box and cut using a hack saw.
Position the seam binder on threshold or the carpet seam. Attach the seam binder utilizing screws suitable for your type that is subflooring. Use a screw-head that matches the taper on the binder.

The Duties of Moving Out
October 25, 2017
Going from a property requires lots of work and preparation. If you’re letting a a house, because your rental is going to expire or whether you’re leaving, in addition, you have several obligations to meet. By paying rent for your time you’re in the home, providing appropriate notice and ensuring it’s in good shape when you depart, it is possible to prevent added costs and potential legal issues.
Give Sufficient Notice
It’s your duty when you go from a rental home to give sufficient notice. This notice dated and needs to be created using a particular date you will be completely from the house. In California, in the event that you lease on a monthly basis, ’ 30 days notice is officially okay. Then a week is sufficient in the event the lease is weekly. Some agreements will say another particular interval, for example 60 days. It’s your duty adhere to them and to be aware of the conditions of your leasing contract. Say the date you create a replica of the notice on your own, and will vacate the house. Deliver the notice both personally to the landlord or property manager, or send it certified mail with return receipt
Be Outside on Time
Being outside on time demands you to transfer your entire home, including furniture, cartons and trash, in the premises. Get in touch with your landlord or house supervisor to learn when it is OK to abandon it behind in the event you wish to leave specific things behind. Get any arrangements of the nature on paper. Otherwise, you happen to be in charge of the expense of removal. You are able to be held liable for yet another month’s lease should you be in the house following the full time which you indicated in your notice.
Pay the Total Rent Owed
It’s your obligation to settle the rent for your time that the house is lived in by you. For instance, in the event that you lease on a month-to-month basis, and you also give notice on the 10th day of any offered month, you’re able to leave thirty days after providing that not ice, however you will need certainly to cover rent for the 10 times of the next month included in your not ice. You happen to be liable for that added 10 days unless the home is let to somebody else who pays all or portion of the hire for this span, even in case you move-out before that point.
State of the Home
Leave the house in an identical state as when you moved in. You might be liable for just about any fees covered by the landlord to have it cleaned, when it is not. What this means is you’re in charge of ensuring that floors, walls, trim, doors and cabinets and scratches to the paint are touched up. Ensure that appliances, fixtures and window coverings are scrubbed clean, and the status of the outside of the home can be clear of rubble and rubbish. You happen to be liable for fixing or investing in these before you re-locate whether there are any damages to the house your landlord is oblivious of. Record the status of every chamber by means of a cam having a date-stamp as well as each fixture. It’s your duty to show that it wasn’t triggered by you in case harm is found by the landlord after you’ve left. This document is likewise helpful if you’ve want to get it straight back and compensated a security deposit.
The best way to Get Rid Of From a Copper Water Line
October 20, 2017
Utility taps which you locate in cellars, laundry rooms and gardens through the Bay Area are easily obtainable and cheap. Although they are simple to fix, it is usually even more straightforward to just replace one which has developed a flow or become corroded by ocean air or tough well water. These kinds of faucets may be screwed after soldering on a adapter onto the copper supply conduit, but commonly, they can be soldered right to the conduit. Either way, eliminating a faucet is properly inside the purview of any house easy man.
Switch the water off by turning off the shutoff valve for the waterline; flip off the primary water-supply for the home if you if you fail to locate one.
Open the faucet and allow the water drain. Keep the faucet open while it is removed by you.
Remove the screws holding the faucet from any area to which it’s attached, including the face of a wall or your home, using a screwdriver. Pull on it as far from the wall as possible.
Unscrew the faucet from a adapter using a pipe wrench. Tighten the wrench across the bottom of the faucet and, grasping the pipe hard using some of pliers, turn the faucet counter-clockwise. The faucet will not change as well as in the event the screw threads are becoming corroded, aerosol on lubricant and decide to try again in five minutes.
Make use of whether it’s it is soldered to the conduit, a propane torch to get rid of the faucet. Shield the top to which it had been attached using a heat-shield, like a 6-inch by 6-inch piece before heating the the bond of sheet-metal.
Light the torch until it is in regards to the width of a pencil and 6″ long, and change the fire. Hold the point about two inches from your joint while the faucet is simultaneously held by you using a pair of pliers.
Keep a slight pressure using the pliers. In the stage when the temperature of the joint becomes large enough to melt the solder, the faucet will slip off the conduit. Drop the faucet in to a pail of water to cool it.

The best way to Clean Paint Brushes After Utilizing Latex Paint
October 15, 2017
Excellent paint jobs focus on high quality paint brushes, and quality brushes could be costly. But in case you take proper care of your paint brushes, they are able to endure for a long time. Suitable paintbrush attention needs cleaning the brushes instantly after use to stop the paint from sticking to the bristles. Latex is a water-based paint, and that means you don’t have to to use any kind of chemicals to clean your brushes.
When you finish utilizing it, rinse the paint-brush under tap water just after. Water temperatures may damage the adhesive holding the bristles in to position, while chilly temperatures make it more difficult to get out the paint.
Fill the sink with tapwater to fully submerge the paint-brush. Add several drops of mild dish soap or hand soap.
Set the paint-brush in the water. Work the latex paint away together with your fingers by squeezing and lightly massaging the bristles. Begin in the butt of the brush close to the steel band and work your way up to the ends of the bristles.
Rinse the soap from the paint brush with tap water that is warm. Softly spread the bristles close to the butt of the brush out to rinse out any paint which has accumulated there. Keep rinsing the brush before the water runs clear.
Pat the heel of the paint-brush from the palm of your own hand to shake water from the bristles.
Set the paint-brush. Fold the towel on the bristles and lightly press down to squeeze out any excess wetness. Leave the paper-towel on the bristles to assist its contour is maintained by the brush. Place a side on a level surface to dry.

The best way to Graft Mangoes
October 10, 2017
Mangoes are fresh fruit which are native to sub-tropical climates. They grow best in sub-tropical climates with high temperature and humidity. In temperate climates, mangoes are more difficult to increase andl generally generate fruit that is less. Some gardeners prefer grafting, thanks to the capability of the plant to carry the genetics of a current tree to a fresh sapling while there are lots of approaches to put mangoes effectively. This gets rid of the possibility of possibly negative genetic variations and helps to continue development. The procedure for grafting a mango needs a little a strategy as well as gardening ability.
Create root stock development utilizing the seeds of a mango tree that is successful. Fertilize and water the seed till development happens. Let the newest seedling stalk to develop into a depth of about 3/8 to 1-inch in In the event the seedling is green in colour, without disorder or rot, plus it creates wholesome leaves and buds, it’s going to be helpful as a root-stock. The appropriate age for root-stock is generally between ONE year old and SIX MONTHS months.
Cut the root-stock off about 4″ over the ground by means of some of a knife or really sharp pruning shears. Make the cut amount, and prevent any injury to the stalk below the wound. Take advantage of your knife to divide the rest of the stalk in half in the top down to about 1-inch over the top layer of the earth.
Find development shoot, or a scion, on a current mango tree. The scion needs to be gotten from an effective tree that generates blossoms and routine quality fruit. The scion should have a depth equal to or somewhat smaller in relation to the rootstock to which it is going to be grafted and should have leaves that are healthful and refreshing buds. Take advantage of your knife to slice the on the scion in the tree trim straight back the top-most leaves.
Cut the end-of the 5- to 6-inch-extended scion in a wedge-shape. Slit the bark along each aspect of the scion to generate an point in the centre away. S O the various cuts line up slip the scion wedge to the slot you’ve got cut in the root stock. Take advantage of your tape to roll the rootstock closely to the scion to ensure all is held securely in location.
Put a plastic bag within the graft that is brand new in the top down, and tie off it in the underside. The graft is protected by the tote from pests and bugs and supplies a mini-greenhouse effect by increasing the dampness and temperature ranges. Cover the bag having another paper bag for a little shade in the event the graft sits indirect sun.
Eliminate once the tree h-AS began growing, when the tree begins to create new leaves and take away the tape. Water the grafted tree as you would a regular mango sapling.

The best way to Remove
October 6, 2017
When operating on a bathroom, you should use caution. When the porcelain split or is damaged during fixing, it usually means the toilet must be replaced. A straightforward job turns into a project that is complicated. You don’t need pipes expertise to get rid of a toilet seat that is rusted. You will find just two fundamental techniques to get rid of the seat; the procedures are clear-cut, as well as both systems are easy to do. The job needs close-quarter work, also it might need several hours to get rid of the toilet lid.
Treat the Rusted Screw
Put the end of a screwdriver to the slot of among the two covers on the other side of the toilet seat and gently pry up to turn the cover backwards. Repeat the procedure on the cover that is other.
Place a paper on the ground underneath among the screws that were rusted.
Place the nozzle point of a can of penetrating fluid where the nut and the screw connect and squeeze the can to push oil across the surface of the nut
Set the nozzle point of the can in the underside of the nut while transferring it driving oil up beneath the nut on the screw and squeeze it.
Repeat the procedure with all the 2nd screw on another side of the bathroom.
Leave the oil in place for 2-4 hrs to loosen the nuts across the screws. Use more oil a long time to the procedure.
Take away in the screws and lift-off the toilet seat that is rusted.
Saw the Rusted Screw
Place a strip of duck tape on the porcelain supporting the plastic handles across the broad of the bathroom. Put another strip in entrance of where the porcelain is met by the connections. These strips of tape take care of the porcelain.
Flip straight back the handles over the screw heads by prying up and putting the suggestion of a screw-driver in the slot of every plastic cover supporting the toiletseat.
Lay the blade of a shut-quarter hack saw, obtainable at components shops, flat on the porcelain. Slide it between the connections where the porcelain is attached to by the toiletseat and observed through the screw. Repeat the procedure on another screw.