
Is a Rubber Plant Poisonous to Children?
December 30, 2019
Rubber plant’s (Ficus elastica) common name does not imply that it’s pliable. Its milky white sap includes latex, which has been originally used to make rubber. Because this sap is poisonous to pets and people, rubber plant is best set out of reach of children.
Plant Debate
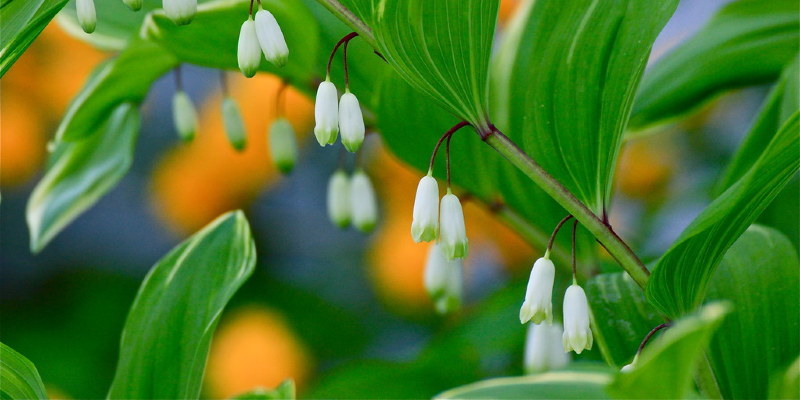
In its ongoing zone across U.S. Department of Agriculture plant hardiness zones 10 through 12, rubber tree may grow to 25 feet. As a houseplant, nevertheless, rubber tree’s growth is more controlled, growing 2 to 10 feet tall. You might have purchased a houseplant that wasn’t labeled as “rubber tree” or “Ficus elastica,” so knowing how to recognize this plant is very important to determine its poisonous potential. Rubber plant’s main identifying characteristic is its thick, wide, dark-green, oval leaves. New leaves appear at the top of a plant usually with a reddish tinge and are coiled until they unfurl. If you nick the stem, then you will see a milky white sap ooze out.
Irritating Sap
Rubber plant’s sap produces a colloid that contains components including wax, albumin, enzymes and sugar. However, the ingredient in the sap known as caoutchouc is the primary culprit. Caoutchouc is the element that not only provides latex its elastic quality but is also capable of causing an irritating reaction to the skin, mouth and eyes of children. This latex, which is found in all Ficus species, is the same component in latex gloves that leads to skin dermatitis in some people.
Toxicity Class
Poisonous plants don’t have to cause death to be considered poisonous. Toxicity covers a spectrum of reactions such as allergies, asthma or internal poisoning. Poisonous plants include substances that cause these reactions. The University of California, Davis, places rubber plant at Toxicity Class 4, that’s the least-dangerous class of four classes. Plants in Toxicity Class 4 trigger dermatitis from their sap, which is as gentle as an irritation for as strong as a skin rash. The rashes may be serious, causing severe pain to some children.
Swift Action
If a young child is exposed to rubber plant’s sap, then first eliminate any plant parts that may be in the kid’s mouth and then rinse the mouth thoroughly. If the sap gets on the kid’s skin, wash the affected area with soap and then rinse with cool water. If the sap gets into the kid’s eyes, gently flush the eyes for 10 to 15 minutes with lukewarm water. If blisters or a rash develops, call your regional Poison Control Center as soon as possible.
Plants for Rockery Gardens
December 28, 2019
Rockery gardens create a well-drained environment which may hold a relatively large number of plants for the space that the garden occupies. Choose low-growing plants using non-aggressive habits which won’t conquer their neighbors. Find the garden in sun, shade or partial shade, and choose suitable plants for each exposure. Most stone garden plants are easy to develop, but they need regular maintenance to keep free of weeds and to maintain them in the proper size.
Succulent Plants
Low-growing succulents grow slowly and have attractive growth habits for year-long interest. Hens and chicks, also known as houseleek (Sempervivum spp.) , have leaf rosettes that resemble a rose flower. Green leaves may be tinged with pink, bronze, purple or red, depending on the species or cultivar. Typical houseleek (Sempervivum tectorum), growing in U.S. Department of Agriculture plant hardiness zones 5 through 10, has pink, purple or red flowers at the ends of short stalks in summer. For mounding rather than rosetted growth, stonecrops (Sedum spp.) Offer numerous species and cultivars. “October Daphne” stonecrop (Sedum sieboldii “October Daphne”) rises 6 to 12 inches tall and wide in USDA zones 3 through 9. Blue-gray leaves possess pink margins and then turn pink in sunlight. Foliage is topped by showy pink to lavender blooms in autumn. Both these succulents prefer full sunlight.
Shady Area Plants
Many choice rockery garden plants thrive in shaded conditions. Holly fern (Polystichum tsus-sinense) includes evergreen, triangular fronds with black venation and grows 6 to 12 inches tall. It can tolerate some morning or late day sun and is hardy in USDA zones 6 through 9. Cyclamen (Cyclamen hederifolium), hardy in USDA zones 4 through 9, displays vibrant deep green leaves which have variable silver markers in autumn when it blooms. Showy, white to pink flowers are held above the foliage on thin stalks, with numerous blooms per plant. The plant dies back after booming and is dormant during the summer months.
Ground Covers
Plants with mat-like growth offer great contrast to clumping or mounding rockery garden subjects. Think about “Red Mountain” ice plant (Delosperma dyeri “Psold”), growing in USDA zones 5 through 10. Trailing stems are covered with vertical, cylindrical succulent leaves and bright red, showy blooms. Put it to trail over stone edges or built-in terraces. It rises 2 inches tall and 15 to 20 inches wide. For a plant with fragrant leaves and showy red flowers in summer, creeping thyme (Thymus praecox “Coccineus”) rises 1 to 2 inches tall and spreads 12 to 18 inches wide. These botanical plants grow in USDA zones 2 through 9.
Early-Blooming Plants
Some rock garden subjects can provide the oldest bloom in your garden. The fragrant, 6- to 8-inch-tall, blue to purple blossoms of reticulated iris (Iris reticulata) look before the narrow, grass-like leaves are fully emerged. The plants die down for the summer, leaving the rounded bulbs underground. Find reticulated irises in which they don’t find much summer water to avoid decay and make certain bud set for the following year. They’re hardy in USDA zones 5 through 9. Common snowdrop (Galanthus nivalis), a different substrate plant using early bloom, can have flowers as early as late winter. It grows 4 to 6 inches tall and wide in sun or partial shade in USDA zones 3 through 8.

How to take care of a 6-Inch Goji Plant That's Sprouted
December 26, 2019
Noted for its antioxidant-rich red fruits, the goji berry (Lycium barbarum) is just a sprawling Chinese shrub that reaches heights up to 12 feet. Its delicious oblong berries, which step from 1/2 into 1 inch long, could be eaten raw, dried or juiced. A 6-inch seedling will need some alterations prior to being planted outdoors in U.S. Department of Agriculture plant hardiness zones 3 to 10.
Understanding a Goji Seedling
The vine-like and sometimes thorny canes of this goji plant create narrow gray-green leaves in spring and star-shaped, self-pollinating white or purple flowers in late spring to early summer. Those blossoms are followed by berries from mid-summer via fall, though the plant might continue to bloom the whole time it’s fruiting. It sheds its leaves and wrapped into dormancy once daytime temperatures drop below 50 degrees Fahrenheit. Goji seedlings grow rapidly, sometimes up to 7 feet within their first season, and thrive in alkaline soil in full sun. Some can begin producing berries within their second year, though some may wait until their third party.
Transplanting a Goji Seedling
In case the 6-inch goji seedling is still in a sowing container, transplant it into a 4-inch-diameter tree pot with drainage holes to adapt its long tap root, as the seedling must be at least 1 foot tall until you set it at the ground. After filling this pot with a mix of 2 parts garden loam to a part sand, dig a hole at its center and place the goji plant so that it sits at precisely the same depth as in its previous container. Put the pot on a sunny windowsill or under a grow light, and keep its soil gently moist until the cylinder is well-established, after which you are able to allow the soil to dry to 2 inches under the surface before watering the cylinder again.
Moving a Goji Seedling
If you began the goji seedling inside, bring its grass outdoors in the spring after danger of frost is past. Place the pot in a mostly shady site where it will get just two hours of sunlight its first day. Slowly move that, enough to enable it one additional hour of sun each day, until it’s in full sun all day.
Raising a Goji Seedling
Goji plants don’t require fertilizer and may, in reality, be hurt by too much of it. Since they belong to the same family as tomatoes (Lycopersicon esculentum, USDA zones 9 through 12), goji plants are susceptible to a few of the same blights. They can also develop powdery mildew if subjected to bad air movement or overly arid soil. To help prevent such problems even though you are waiting to plant the seedling, keep it at an airy, open spot from the vegetable garden, never to allow its soil to dry out completely, and spray it thoroughly with an organic biofungicide containing Bacillus subtilis at the first sign of dark or wax leaf stains. You can purchase a ready-to-use version of the biofungicide or mix 2 tablespoons of this concentrate with 1 quart of water. Continue to spray the plant once weekly provided that the issue persists.

Do Deer Eat Kieffer Pears?
December 22, 2019
Wildlife lovers plant pear trees (Pyrus spp.) , such as Kieffer pear trees (Pyrus communis x P. pyrifolia), in their yards to attract deer. Deer love eating the fruit of these trees because they are rich in sugar, which provide the bull. Planting Kieffer pear trees will surely work, if you want deer to visit your lawn.
Kieffer Pear Trees
Kieffer pear trees are trees which grow in a variety of climates, including some ones that are warmer which other pear trees don’t tend to grow as well in. You’ll find them in U.S. Department of Agriculture plant hardiness zones 4 through 9. The fruit of this Kieffer pear is somewhat rough and crisp, harder than the more common European Bartlett variety (Pyrus communis), which develops in USDA zones 5 through 8. Pear trees make a soft pear, sold in most grocery stores. Kieffer pears are more appropriate for pickling or canning, but that doesn’t discourage deer from eating their fruit.
Forget the Partridges, Deer and Pear Trees
Deer love eating apples, pears and persimmons, all of which are rich in carbohydrates. The fruit provides the energy that they need to nurse their young to them or for males to grow into full-grown bucks. With their small white flowers that blossom in spring, Kieffer pear trees are a good choice for attracting deer since these trees produce a large amount of fruit in a short quantity of time, normally through October from September. Most Kieffer trees produce fruit within three to five years of being implanted with little pruning.
Why Kieffer Pear Trees are a Good Selection for Deer
Unlike other kinds of pear trees, Kieffer pear trees are self-pollinating. This Kieffer tree’s flowers comprise both anthers and stigma, so that they can pollinate themselves with the assistance of animals like bees and birds. They will help ensure a crop of pears if you have lots of these pollinators around. You don’t require an orchard filled with trees to allow them to grow the deer you wish to draw a good quantity of fruit, while Kieffer trees will produce more fruit nearby, even another kind of pear tree. These trees are also a kind of bacterial disease that can affect other varieties of pear trees, drought resistant and fire blight resistant.
Kieffer Pear Trees in the Garden
Kieffer pear trees grow to 15 to 30 feet tall with a spread of between 12 to 20 feet. Plant these trees round the exterior of your backyard to protect foliage that is sensitive you would like deer to avoid, while providing them with a tasty snack. If you don’t want your Kieffer pear fruit to be eaten by deer, fence your house to keep them. Use solid fencing that is at least 8 feet tall and 20 feet out of your Kieffer pear trees to stop deer from reaching the trees or leaping over the fence. Don’t plant other types of fruit-bearing trees or Kieffer pear trees in case you don’t need deer.

Can Household Bleach Harm a Pine Tree?
December 18, 2019
Whether you’re cleaning moss off a roof or power-washing your sidewalk, then bleach is a anti-microbial pesticide and fungicide that cleans and disinfects hard surfaces. While diluted bleach solutions, like a 1-to-10-parts bleach and water mixture, are not as likely to harm a pine tree (Pinus spp.) , bleach can damage the tree’s needles or even rinsed off with lots of fresh water.
The Effects of Chlorine Bleach
Chlorine bleach (sodium hypochlorite) is corrosive at 100-percent strength. When used at a solution of equal parts water and bleach, as is recommended when cleaning a roof, then the remedy will burn the foliage of trees and plants within 10 minutes.
Preventing Damage to Trees and Plants
To protect a pine tree, like a Monterey pine (Pinus radiata), hardy in U.S. Department of Agriculture plant hardiness zones 7 through 10water thoroughly and wash the foliage with plain water prior to using the bleach solution on the roof or sidewalk. Rinse the fibers and the plant within 10 minutes of exposure of the pine tree , completely soaking the foliage, bark and dirt.
What Happens to the Bleach?
The chlorine in bleach disappears. Until the chlorine has evaporated diluting the bleach with considerable amounts of water, its effects minimized. Any remaining bleach solution in the soil rapidly breaks down into saltwater.

Roper Oven Troubleshooting Information
December 15, 2019
Roper electric ranges feature easy-to-clean cooktops and spacious ovens. An offshoot brand of Whirlpool, Roper has a reputation for sturdiness and reliability — but that does not mean that you won’t sometimes run into issues with your own range. When the oven component experiences problems that impact its performance, preparing food may become a struggle. Some issues may require expert help, but it is possible to troubleshoot fundamental concerns yourself so that your next meal is on the table on time.
Won’t Operate
In case your oven won’t operate in any way, your first task is to check its electricity supply. Make sure that the stove is plugged to a usable grounded socket. To determine whether the socket is working, plug a small appliance such as a blow dryer or lamp before and turn it on. If the outlet does not have electricity, examine your home’s fuse box or circuit breaker and replace any blown fuses, or reset the breaker as vital. Consult with an electrician if you can not find a problem with the fuse box or circuit breaker and the outlet still isn’t functional.
Temperature Too High or very low
If food takes longer to cook than is usual, or it burns during the normal baking time, your oven’s temperature might be too low or high; its temperature calibration requires adjustment. To adjust it, then make sure the temperature control knob is set to Off and pull it right off. Turn the knob over and loosen the locking screws in it. To lower your oven’s temperature, then grasp the knob firmly and turn the outer part counterclockwise until you move the tooth a notch to the left. To increase the temperature, hold the barbell tightly and turn the outer part clockwise until the tooth moves one notch to the right. Each notch signifies 5 degrees. When you’ve adjusted the temperature to your satisfaction, tighten the locking screws and then reinstall the knob on the range.
Poor Cooking Results
If you aren’t satisfied with the cooking results in your oven after adjusting the temperature calibration, ensure that the full range is flat. Set a rack in the oven and set a flat on it to check the levelness both side to side and front to back. If you realize that your range isn’t flat, pull the appliance ahead until the rear leveling leg originates from your anti-tip bracket. In case you’ve got a model with storage drawers, then you’ll require a 1/4-inch-drive ratchet, pliers or a wrench to adjust the cutting legs before the range is flat. If the Roper stove is flat however, the oven still isn’t producing satisfactory cooking results, make sure that you’ve positioned the racks correctly in line with the guidelines in your owner’s manual. You have to leave enough room for air to circulate around your cookware — there should be at least 2 inches of space between your bakeware and the oven walls.
Oven Light Out
In case your oven light goes out, then the bulb likely needs to be replaced. The oven requires a standard 40-watt appliance bulb, which you may find in your neighborhood home improvement or hardware store. Make sure that the oven is turned off and fully cool before replacing the bulb. Unplug the range. Reach into the back of the oven to flip the glass bulb cover counterclockwise to remove. Twist the bulb in a counterclockwise direction as well to get rid of it from the socket. Replace with the new bulb and reinstall the cover, turning in a clockwise direction. As soon as you plug your stove back, your oven lighting should be operational.

How to Decorate a Picture Glass Block
December 10, 2019
Glass blocks, like those used in certain window and translucent wall installations, can be morphed for almost any event, based on the way you decorate them. Craft stores carry glass blocks that seem like the type found in home-improvement stores, using a predrilled hole so you are able to fill without worrying about specialty drill bits or glass shards, the block in any manner you need.
Shine on Through
Strands of lights like twinkle lights are a way. Opt all in 1 color for an ambient glow. Tiny strands in a wedding-decor section of a craft shop are more easy to manage. The light strands throughout the opening in the glass block, leaving the plug or battery-operated end out for easy access. Choose glass blocks with blue or white lights and an wavy texture to create a faux ice-block sculpture.
Faux Frosted Designs
Glass frosting glass or spray etching spray create a look similar without needing sandblasting to etched glass. Put a stencil on the glass together with the design that is desirable, securing it using painter’s tape. Since the stencil sticks by itself, you also may make your own stencil from contact paper, which works on glass. Spray the design insert lights or on the sides, then display or on the front glass panel is.
Water Wonders
A decorative glass block using a transparent front functions as an aquarium or water-filled screen. Clean out the inside of the glass block out it and swishing it around. Fill it with water to ensure there are no leaks. Insert a small amount of clean aquarium gravel or slippery river stones, water and morimoknown as chunk moss, without needing much light or some other food which protects itself. Through the hole add a transparent single-stem flower vase for another design, place river stones in the base of the block.
Small Scenes
With no water To get a look that is water-inspired, pour in a little bit of sand to create a tiny beach then add miniature and seashells, starfish driftwood pieces. Paint the exterior of the back panel, if desired, using glass enamel paint of this block, or go the route that is sunset and paint a sunset-inspired skies scene. Place the glass block on a windowsill. A terrarium with soil and tiny plants fits inside the block, or fill out the block with collected trinkets like marbles classic toys keys or vibrant layers of beans.

The Way to Refinish a Resin Countertop
December 7, 2019
Refinishing a classic resin counter will bring new life to the surface. Resin countertops are produced from a substance commonly referred to as a stabilizer and epoxy. The stabilizer could be marble dust or difficult mixes. Resin is influenced by UV rays or sunlight. A protective coating is usually placed to protect it. With time and normal wear and tear, the coating dyes and the resin is ruined.
Cover and wall regions with sheets or tarps. Using masking tape to attach plastic to the walls round and on the faces of the countertops. Remove other or furniture items.
Sand the resin counter. Use an orbital sander using 60-grit sandpaper to remove the top coat and smooth out any dings, scratches or scars in the surface. Vacuum the debris and dust using a vacuum off. Repeat the process utilizing 120-grit paper to smooth and the surface. Vacuum off all the debris and dust. Wipe down the counter using a clean cotton rag.
Prepare the resin in a paint pan. Carefully read all the instructions and signs on the resin.
Apply a coating of the resin to the coated surface by means of a paint roller. The resin is rolled on by smoothly tops. Overlap each pass of the roller until the counter is covered. Permit the resin to dry for at least 24 hours according to the manufacturer’s recommended drying time.
Sand the resin softly. This will smooth any roller lines left during the resin program away. Vacuum any dust or debris off and wash clean with a cotton rag.
Apply a coating of polyurethane. Smooth on the coating and allow to dry to some barely feel. Apply a second coating and allow to dry for 24 hours before using.

The Way to Wire a Wall Outlet
December 4, 2019
The common voltage at a U.S. house is rated at 120 volts. Except for a specialty outlet, such as for bigger BTU air conditioners, a stove or some clothing dryers that are electric, almost every other wall outlet will probably be a polarized outlet with a third-prong grounding plug. Homes were just fitted with sockets and can’t be retrofitted with a three prong grounding outlet. But the fundamental wiring technique is exactly the exact same for all wall sockets, not.
Turn off the breaker that supplies power. Switch off the electrical supply breaker if you don’t know which breaker which is.
Test the wall outlet for power using a tester. These can be found in hardware stores. They have two prongs which you insert in the outlet and a light which glows if power is detected. There should be no power to the outlet once you switch off the main breaker. If power is detected, don’t proceed; a significant electrical problem is and also a certified electrician must be called in to rectify the circumstance.
Remove onto the outlet. Typically you will need a small slotted-head screwdriver to remove the plate.
Test the wires. This is a preventative evaluation in case the socket is currently malfunctioning. When there’s absolutely no power to the wires, proceed.
Remove the outlet. Typically, it is going to be held in one at the floor, one on top and by two slotted screws. When the screws are removed, pull on the outlet out of the box.
Remove to your wall outlet. There’ll be a white cable, a black wire and a copper wire for the ground cable. Unscrew the screws holding them onto the outlet and pull the wires off. If the cable covering frayed is nicked or compromised to show bare wire beneath it, cut on the cable. So that a 1/2 inch of cable shows cut, strip the cable covering off, using a cable stripper.
Replace the wires onto the wall outlet that is new. The white cable attaches to the steel or post. The cable attaches to the post that is bronze. The aluminum or green cable attaches to the green post, which can be marked on several sockets, or the ground screw, if not marked. Tighten screws.
Wrap the wall outlet around the sides with electric tape, to cover up the white and black cable attachment screws. This is a security precaution which will avoid any shorting or arcing.
Reassemble the wall outlet. Press the outlet inside of the receptacle box and then screw it in. Replace the outlet cover and test for voltage once you reset the breakers. When there’s absolutely no voltage at the outlet, remove the face plate and then examine the wires. When there’s absolutely no voltage to the wires, you may have a problem within the house wiring. Turn the breakers off and call a licensed electrician.

How to Remodel a Basement Bedroom
December 2, 2019
Your home’s living space expands, providing more space for your family. The additional completed footage can increase your home’s market value. But if your basement bedroom feels like an underground dungeon, it might be time. Remodeling your bedroom doesn’t mean that you must endure months of expensive reconstruction. Simple modifications can perform wonders on a shoestring budget. Change up the colour palette, add new textures, and brighten up the region to give your basement bedroom a new look.
Paint
Make your basement bedroom appear spacious and airy with a few color tricks used by professional designers. Apply a fresh coat of paint in a neutral colour to walls. Paint colours with a satin finish tend to reflect light, creating your bedroom appear larger and brighter. Winter gray that is gentle or light beige make color choices for virtually any color scheme. Paint your ceiling a couple of shades lighter than the wall colour to provide the illusion of a higher ceiling.
Texture
Modernize your basement bedroom with an infusion of textures that are designer-savvy. Natural woven window shades are best for adding an earthy, natural component. A mattress is the focus of any bedroom, so dress it up. A sleek metal or wooden headboard against a neutral wall colour provides both visual and tactile contrast. Your bedroom brightens and allows you to add a variety of throw pillows in any colour, fabric or pattern you choose.
Lighting
Bedrooms are often lacking in natural lighting and can seem dark and dreary. But by positioning a variety of sources that are light throughout the space, a , cheerful distance that is well-lit can be created by you. Track lighting, recessed lighting and wall sconces are perfect to provide ambient lighting. Insert a dimmer switch to alter the amount of light shining . Light up a dark corner with an attractive floor lamp. Table lamps located on nightstands can provide just the ideal amount of lighting for reading to you. A mirror, cleverly placed to reflect a light source, can brighten a room even more.
Accessories
Hang a vibrant piece of art that is framed on the wall to add a splash of colour. Lay a local rug on wooden or tile floors to add heat real as well as visual. Add energizing lifestyle to your own room with greenery if you’ve got natural lighting. A crystal clear vase holding more or one fresh blossoms is a budget-friendly approach. Place a storage seat at the conclusion of your bed to tuck bed linens away and provide an inviting sitting spot.